Grout lines in showers often get dirty, and mold grows on them if not cleaned often. And let’s be honest, I don’t have the time, and you probably also don’t have the time to clean all grout lines thoroughly every couple of days. And what could be a better solution to our struggle than knowing how to seal grout in a shower? The answer is simple: there isn’t a better way, and believe me, I have searched!
Sealing grout in the shower is of utmost importance as the water running through the walls from the shower or the condensed water from the steam could easily penetrate the grout and cause mold or mildew overgrowth. Both are harmful to our respiratory system and can also cause headaches or fatigue.
A sealant eliminates these problems as the cleaning process will become much more uncomplicated and effortless. I have compiled a list of detailed steps you should follow to seal tile shower walls (and sealing shower floors), preparatory steps before beginning the process, and so on. Follow along!
Before You Begin
Before starting the sealing job, you need to consider some details, such as the tools you will need and other aspects of the project.
Project Details
- Tools: Toothbrush or sponge, warm water, vinegar, dish soap, grout sealer of your choice, rubber gloves, eye protection (optional).
- Skills required: None, beginner-level project,
- Time required: 2 to 3 hours, waiting time included,
- Approximated cost: 20-60$ depending on your sealer of choice,
First things first, learning how to seal grout in a shower, you need to have all the tools required at hand. Many of the materials stated above will be used for cleaning, which you must understand is a crucial step in this process.
Second, you should note that no two grout sealers are the same. You will need to pick the right sealer for the shower carefully depending on the grout type you have applied, as some sealers will only work with specific grout types. To avoid purchasing a product that will not work for your grout type, you should read the packaging instructions beforehand.
If you have correctly selected all the tools and materials required for this project to be successfully finished, you are good to go to the next phase!
How to Seal Grout in a Shower
In this next phase, you should follow these easy steps to properly seal your grout lines and make them waterproof:
Step 1: Repair the Grout and Remove Old Sealer
The first step to sealing grout in shower is repairing the grout and removing old sealant. If you have not applied grout sealer before, you are good to go; otherwise, you will need to remove the old sealer to replace it with the new one.
You should check the grout lines to see if they have any cracks. If there are no cracks, you can skip this step. Otherwise, you should repair them before proceeding to the sealing. Depending on the cracks’ severity, you may need to remove the grout in these areas.
The removal can be accomplished by using a grout saw; you should be careful not to damage the tiles while removing the grout. After removing damaged grout, you should clean the area from the debris formed. Afterward, you need to apply one or more grout coatings. You could even regrout over old grout if the damage is mild.
The grout type must be the same as the old one; otherwise, it will not stick.
Step 2: Clean the Grout
After repairing the grout, you should properly clean it. If you have been letting your grout sit for a while after its application, dust and dirt particles have probably settled on it. Or if your grout is not newly applied, there may not only be debris in there but mold or mildew as well.
You must thoroughly clean the grout lines to remove dirt and harmful mold. This process is easy; you should mix warm water with dish soap or vinegar. Dip the brush or cloth in the mixture and start scrubbing the grout lines until they are squeaky clean. Once you have removed all dirt and mildew or mold, let the grout lines dry for 45 to 60 minutes before continuing to the next step.
Quick tip: Avoid using harsh chemicals such as bleach to clean the grout lines, as it may damage the grout.

Step 3: Dry the Grout
This third step is more of a precaution. You should ensure that the grout is completely dry before sealing it. This advice applies to both cleaned grout and newly applied grout. If you have just cleaned your grout, you should wait about an hour for it to dry. You can lightly touch the grout and see if it feels wet. If it does, let it dry for a couple more minutes.
Likewise, if you had to reapply grout to damaged areas, you should let the grout dry. You should read the packaging instructions to determine how much the grout takes to dry. Use a dehumidifier to ensure the bathroom’s humidity will not slow down the drying process.
Not letting the grout dry in the first case will cause water to get trapped between the grout and the sealer. With no way to evaporate, the water will give way to mold and mildew to grow between the two layers, and you would have to redo the entire process. In the second case, because the grout will not have dried properly, the sealer will not stick properly and will soon crack and chip away.
Step 4: Choose a Sealer
Sealers differ from each other, so you should choose one that best suits the grout in the area you want to seal, and best protects your grout type. Since showers are high-moisture places, you will need to purchase a sealer that can tolerate that moisture amount; otherwise, it will not be able to protect your grout from damage.
There are two main types of sealers to consider: penetrating and membrane-forming sealers. These two have different attributes that must be considered depending on the location of your grout, which in our case, is the shower.
Penetrating sealers, as the name suggests, penetrate the grout due to their composition (containing latex particles or silicone). These tiny particles settle in the pores and make them waterproof, so the water will not make mold and mildew grow on the grout. These grout sealers also make the grout stain-proof and protect it from discoloration.
On the other hand, membrane-forming sealers form a layer over the grout. The layer will serve as a shield from water, debris, and any other unwanted substances that might damage the grout. Some of these sealers also come in different tints, which is a plus if you want to upgrade your grout lines to a new color.
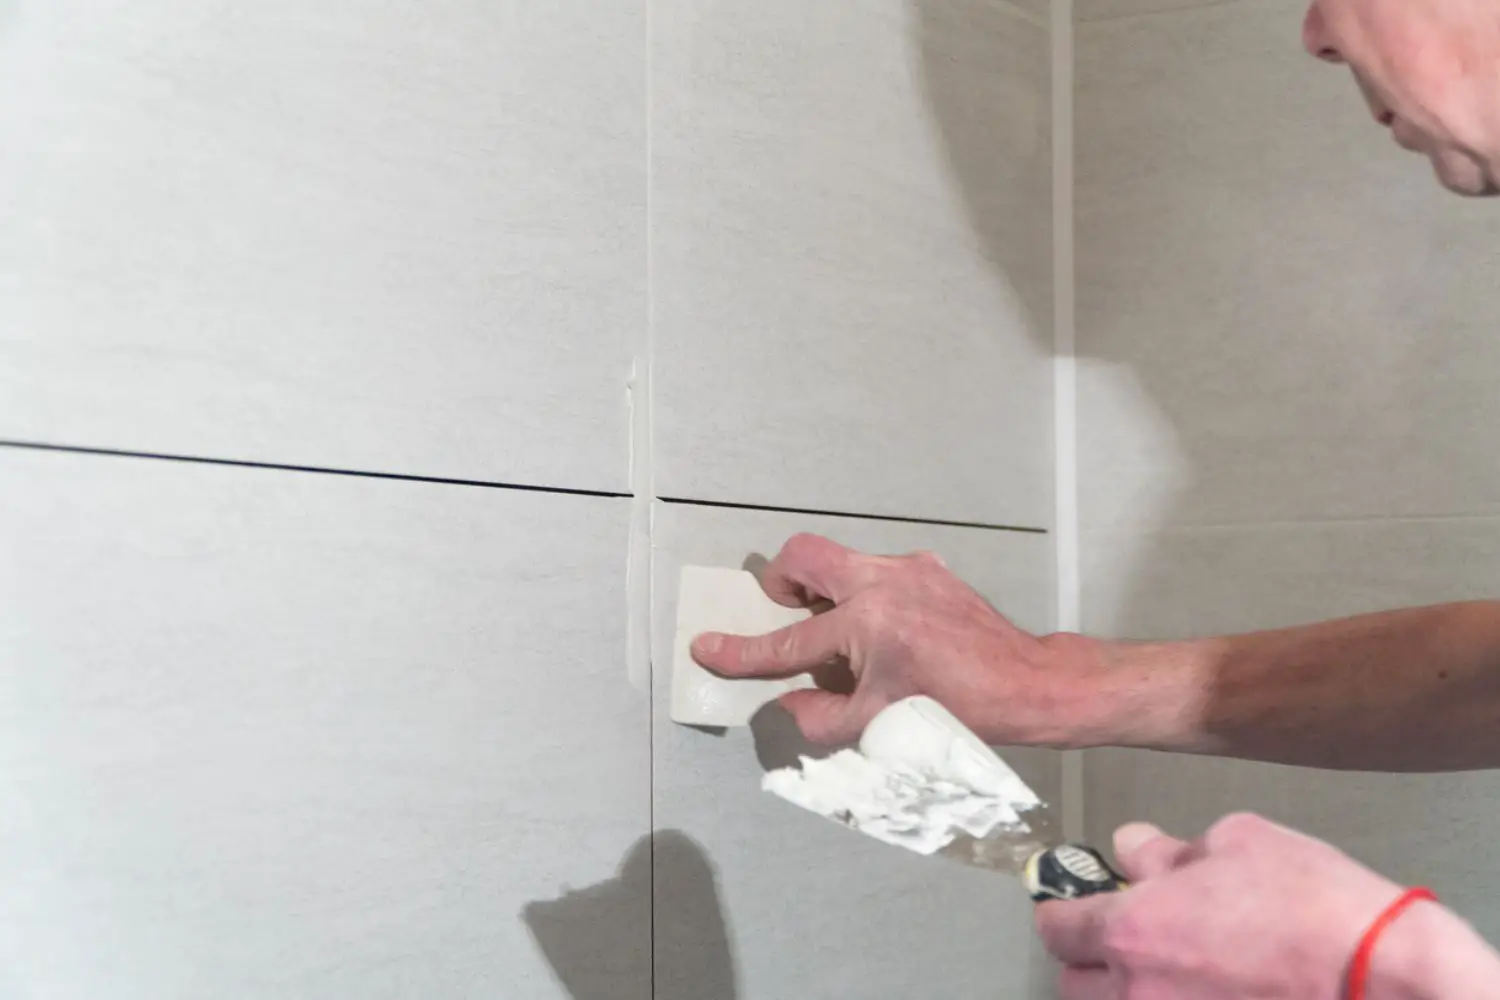
Step 5: Apply the Sealer
After choosing a proper application tool that will fit your needs, it is time for the fun to start! Now you know most of the things that you need on how to seal grout in a shower, and you can start the process without further ado.
You can use the cloth, sponge, or any other tool you have chosen for this task and begin by pouring the sealer evenly on the grout lines and spreading it with the tool you are using. The distribution must be even to ensure there will be no weak spots in your protective shield. After checking if the coating has been spread evenly, you should let the grout sealer sit for about 10-15 minutes.
Warning: Please wipe the excess grout sealer that may have gotten on the tiles, as it will form a foggy film if not cleaned soon.
Step 6: Allow the Sealer to Dry
As mentioned above, after applying the sealer, you should let it dry for a few minutes. Except for air drying, you could use a dehumidifier, as it can speed up the drying process because the bathroom is usually a high-moisture place.
Otherwise, if your bathroom has windows, open them to let the air circulate and to avoid water condensing on the shower tiles if the temperature is too high. Condensed water could ruin all your hard work as it will get into the inadequately dried sealer.
Step 7: Inspect and Maintain the Sealed Grout:
After you seal the grout and let it dry, you should inspect it to see if it has been sealed properly. You can do that by performing the water test. The water test is simple; take a spray bottle and fill it with water. Spray some water on the sealer, and make sure to do so in different areas.
If the water mist forms tiny beads, you have successfully sealed the grout. On the other hand, if it looks like it is being sucked into the sealer in one or more areas, you need to reseal it, as it has not been sealed properly.
Some tips you need to know to maintain grout sealer after it has been properly applied are avoiding harsh chemicals and abrasive scrubbers. Harsh chemicals like bleach can damage the sealer, and soon, it will begin to crack and peel off. Likewise, using abrasive scrubbers is a sure way to damage the grout sealer and should be avoided.
Use gentle brushes instead or sponges/cloth; they will get the job done without causing cracks in the sealer.
Step 8: Repeat the Process if Necessary
If the grout sealer were not properly applied as specified above, you would need to reseal your grout; otherwise, in an area like the shower, water can easily be stuck under the sealer and form mildew and mold. All you have to do is repeat the steps above and check to see if the grout has been sealed properly this time. If so, just let it dry for a day before using the shower, and you are good to go.
If you need to remove the old grout sealer before applying your new one, carefully remove the old one. The process can either be done mechanically by sanding off the old sealer with the appropriate tools or chemically by using chemical strippers or rubbing alcohol to scrub off the sealer. Another way that you can remove grout sealer is by using vinegar and rubbing off the coating.
Before reapplying the sealer, confirm that the grout is clean and dry to avoid trapping residue and water inside.
Waterproofing and Maintenance
Once your grout is sealed, you can ensure it is waterproof by performing the water test mentioned above. It is an easy and non-time-consuming test. Simply follow the steps described in the section above, and you can tell if your sealer is waterproof or not.
Grout sealers wear off with time, so your grout lines will need resealing after a while. Normally, grout sealers need to be resealed after 3 to 5 years; however, it works differently with grout lines in the shower. Because showers are high-humidity areas and generally really wet, the grout sealer’s lifespan is shortened to about a year or perhaps a bit more. So, perform the water test every once in a while to check if your sealer is still intact. If it is not, you should reseal soon to avoid water damage.
To maintain the grout sealer and keep it looking new, you should clean it once in a while. The cleaning can be done with gentle substances that will not damage the sealer, such as dish soap, and scrub off the dirt using a sponge or a brush. If you do not clean often, dirt will accumulate, and although it will not damage your grout lines, it will make your sealer look messy.
Conclusion
As a final reminder to you all, grout sealing is of utmost importance to avoid damage to your grout and keep mold and mildew away from the grout lines. Grout sealing is a much easier process than you may think; all you need to do is properly clean the grout, repair it if needed, let it dry, and then apply the sealer evenly. You should let the sealer dry properly before using the shower. Confirm if it has dried off completely using the water droplet test.
Remember to clean your grout sealer often if you do not want it to look dirty and discolored soon after its application. And most importantly, reseal the grout if it is wearing off.
FAQs
Many homeowners want to know more about grout sealing and what follows after they seal the grout. Here are some common questions and their answers:
Q: How often should you seal grout in a shower?
It’s recommended that you seal your grout in a shower at least every six months. This helps protect the grout from mildew, mold, water damage, and stains. Sealing the grout also helps ensure that it stays looking beautiful and prevents discoloration or cracking over time.
Q: Can you seal grout to make it waterproof?
Yes, you can seal grout to make it waterproof. While the actual grout itself is waterproof and made of a mixture of sand and cement, sealing it will give an extra layer of protection for your tiling project. Sealing your grout is an important step in maintaining the longevity of your tiled areas.
Yes, you can seal grout to make it waterproof. While the actual grout itself is waterproof and made of a mixture of sand and cement, sealing it will give an extra layer of protection for your tiling project. Sealing your grout is an important step in maintaining the longevity of your tiled areas.
Q: What happens if shower grout is not sealed?
If shower grout is not sealed, it can lead to a number of costly and inconvenient problems. Unsealed shower grout is susceptible to buildup of dirt, soap scum and mildew. Additionally, water can seep through the unsealed grout into the wall behind the tile, causing structural damage and weakening in the wall over time. Eventually this could cause cracks on your tiles or even force them off completely!
